|
A lady never reveals her weight... but a jet luge does. in the photos below the guys over at Custom Carbon Components have put the board on some very cool scales. the conclusion... we are going to put the board on a drastic diet. you will see that there are four pad. the weighs the front and back separately, as well as left to right side weights. 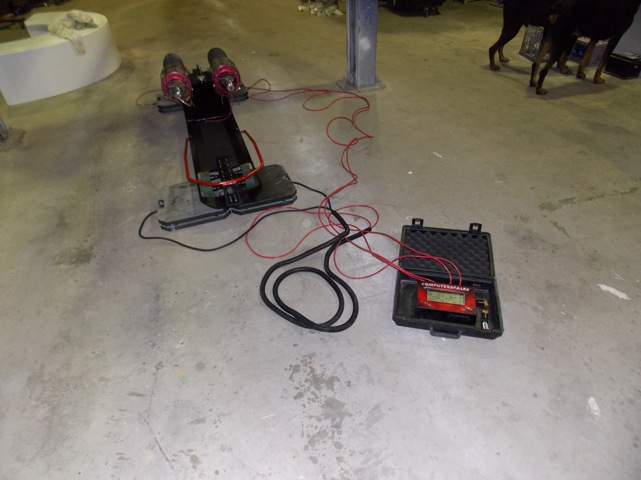
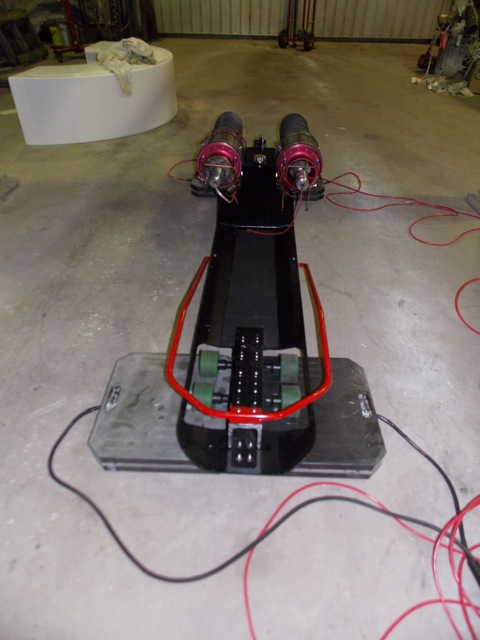
note the pads under each set of wheels to get the weight distrobutions for each side. and front and back. 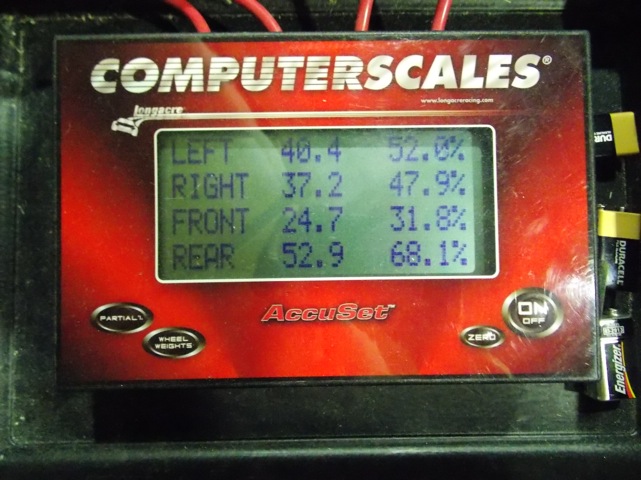
note the weight differentials for each side as well as front and rear. not bad considering it was made in a shed being eyed in with a couple of beers. 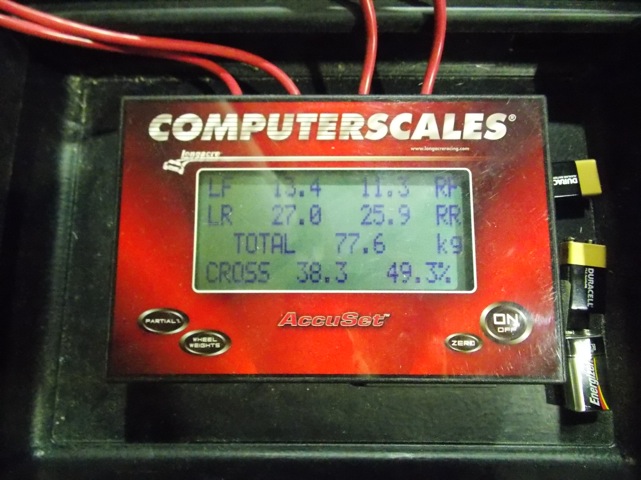
you can see the total weight is 77.6kg this is with a tank of jet fuel but no batteries. so you can understand the massive amount of weight that i am needing to stop with my feet for the record.
we will be looking to drop this by over a third as well we will have a weight distribution of about 55% to 45% front to rear with rider on board. i am open to hear what you think the weight distribution should be. and your thoughts on the boards design. This is the biggest news to hit the jet luge camp since i started this adventure and i am so happy to be able to bring it to you. Today marks the first day that with thanks to the guys at Custom Carbon Components the jet luge is getting a complete overhaul. what this means is we are working together to design and build an entire new jetluge out of carbon fibre. this new board will be completely purpose built and custom made from the ground up. it will be an amazing looking beast built with only two things in mind. stability and speed. with only a fraction of the weight of the current board this will allow for quicker acceleration and easier breaking. with a few ideas that have already been thrown around this board is going to be one crazy awesome thing to look at and watch. Custom Carbon Components have had well over 12 years experience with using carbon composites in the racing arena and combined with some possible wind tunnel testing i feel i am going to be in good hands. I also forgot to mention that Custom Carbon Components are actually a fantastic husband and wife team. 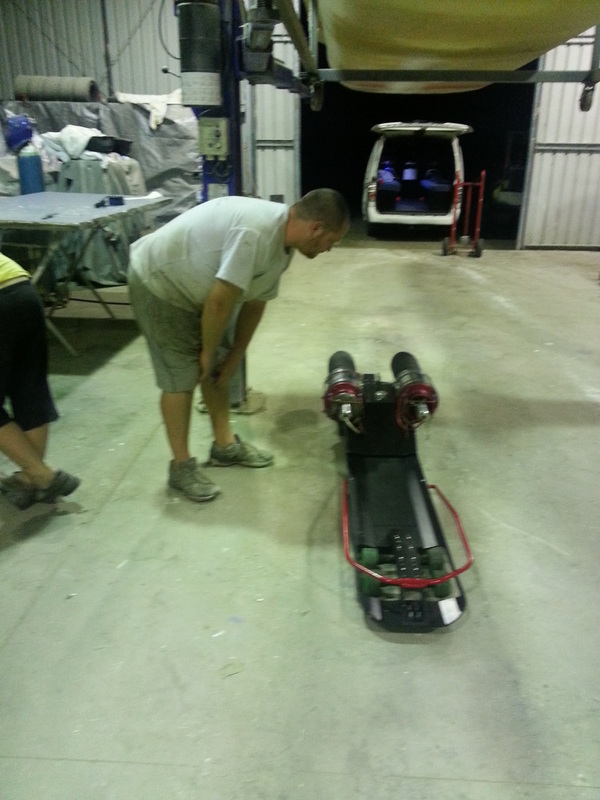 Andrew takes his first look at what is soon to be a completely new and wild looking board. 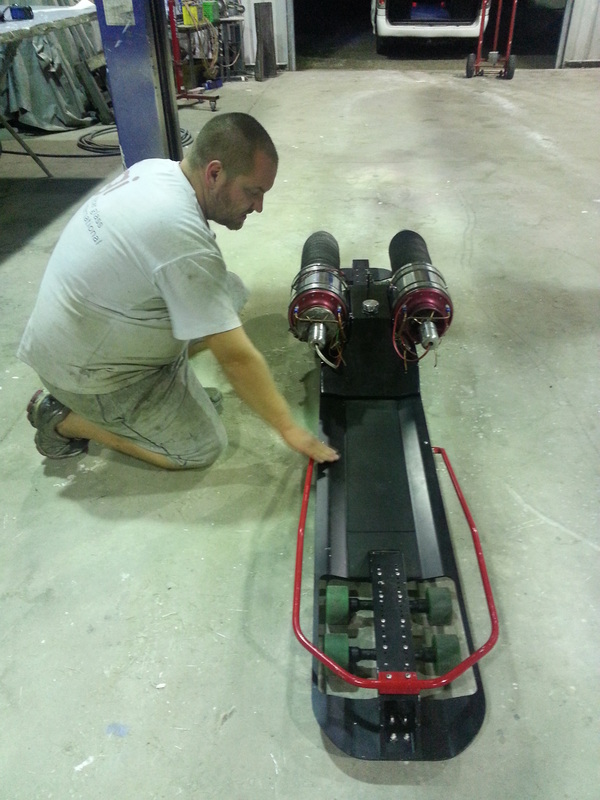 Above you will see Andrew letting the board know he is a friend, he approached cautiously as not to spook the board as he gently reassures it. 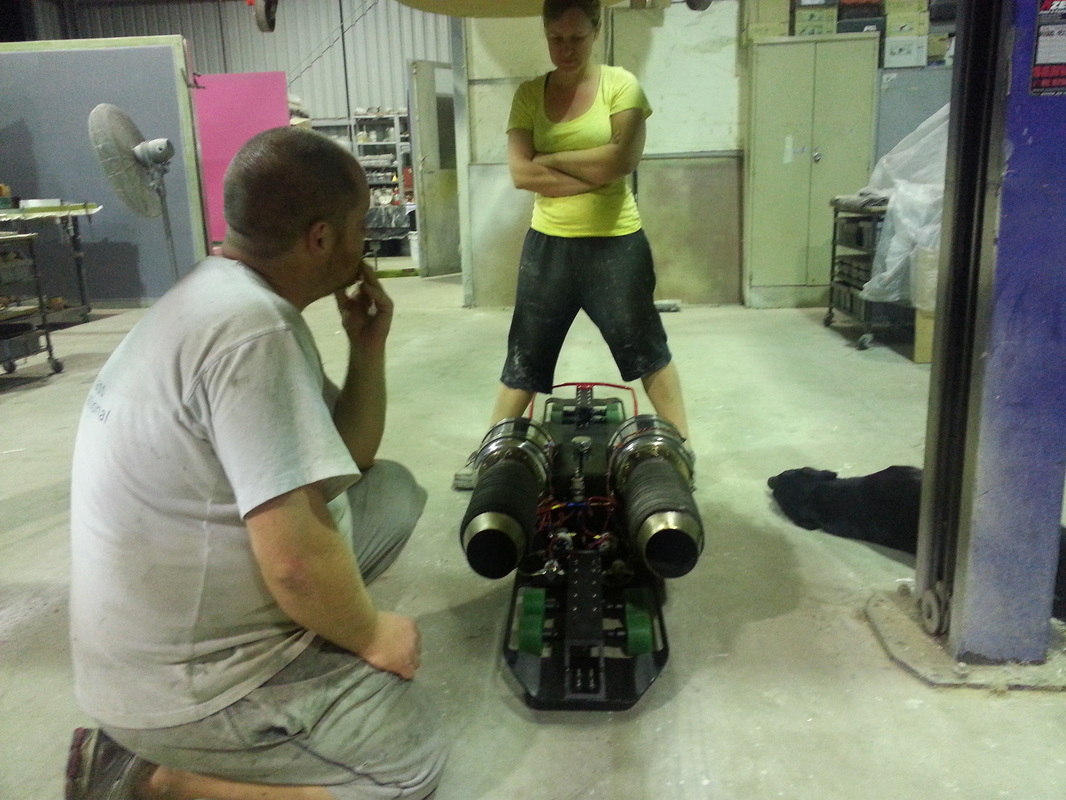 This is how great things a made. a hell of allot of visualising and sentences starting in "what if" and "how about we".
What busy bee's we have been indeed. unfortunately i had to miss out on a streetluge competition, but i believe the results are, and totally will be worth it. you see i had a choice to make recently. the choice was to finalize fittings, plumbing and wiring on the jet luge or head off to a gravity event. i only had enough money for one or the other. and in truth, not really enough for either haha. but as i keep telling myself i MUST do this. i MUST get it done. well judging by those of you who have already snuck a look at the photos. i chose to finalize the jetluge. below is a good friend of mine Dave. he is the man with the magic that is also helping make my board a reality. he has done some amazing work with the fuel and gas lines and he is just as eager to get started on neatening up my mess of wiring. I can't thank him enough for what he is doing. Dave himself owns an amazing little jet powered Daihatsu Charade. that's right, three cylinders wasn't enough so he put in a fighter jet engine with afterburner in it. check what it's like inside the car in the video at the bottom of this thread. 
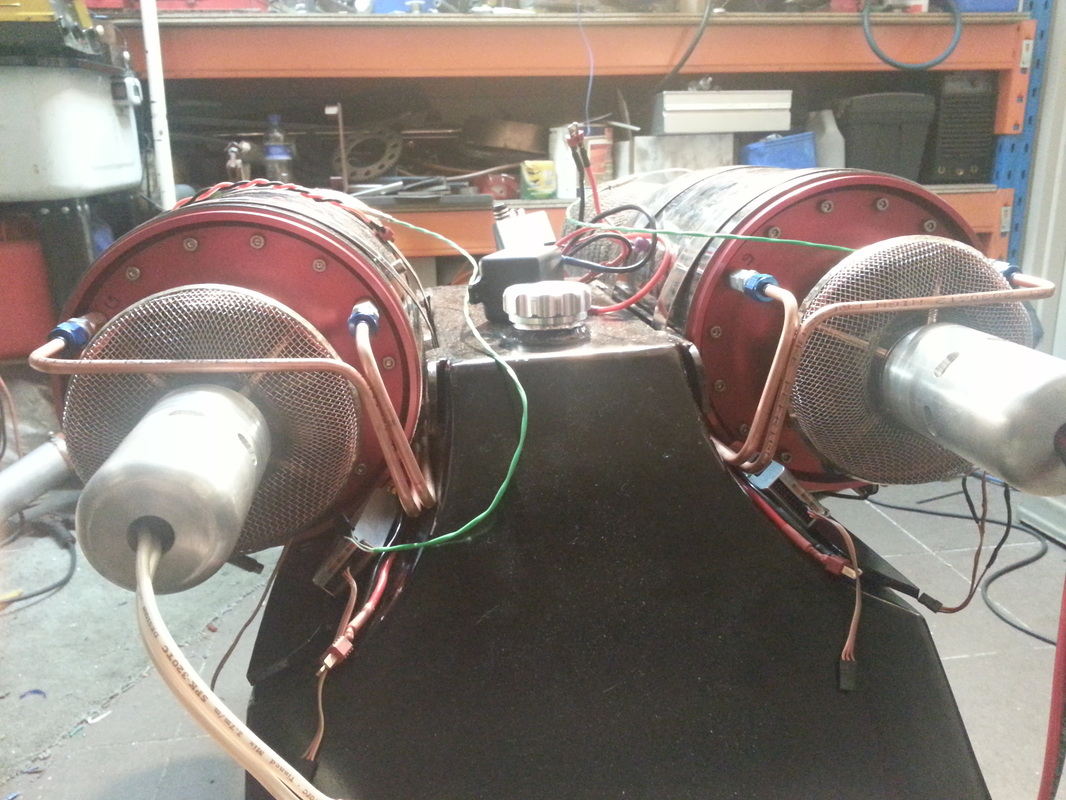
above you will see gone are the old braided lines. i loved them but for safety sake i don't want two metal tubes flapping next to my head at 300kph. besides these look neater and are lighter. 
Those lines then run down to the back of the turbines and connect to the fuel pump. above you can see one of the afterburner pumps and the engines fuel line with the rubber hose connected. 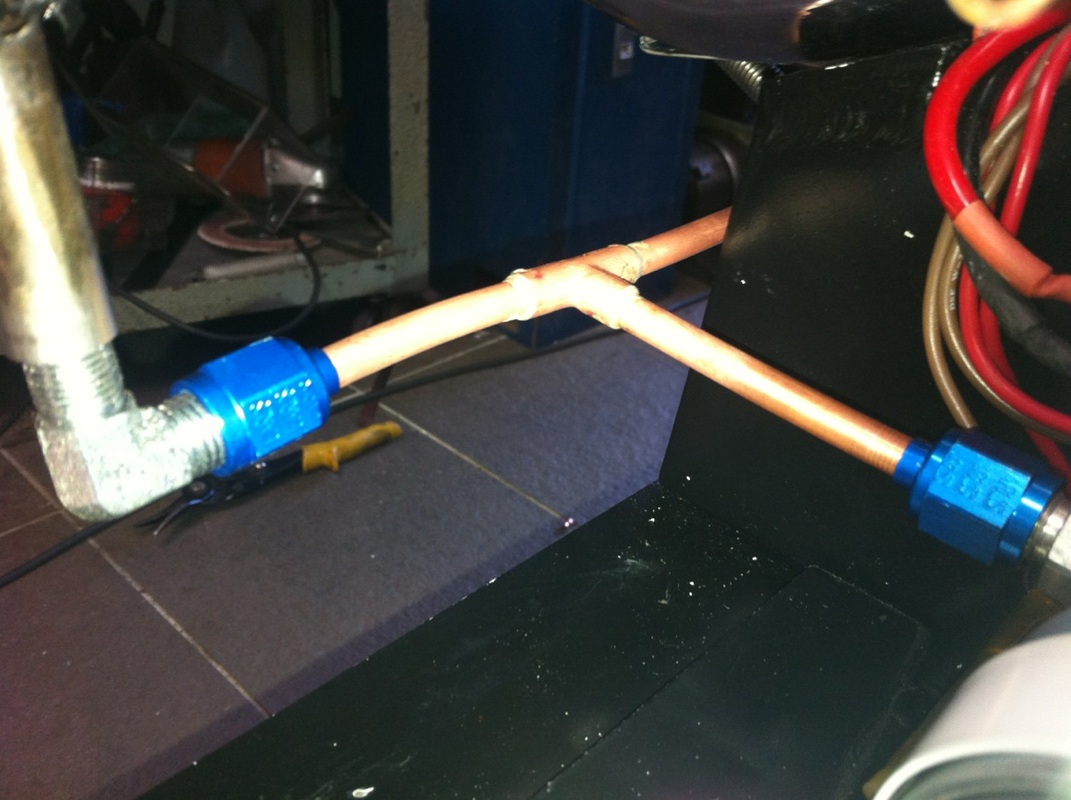
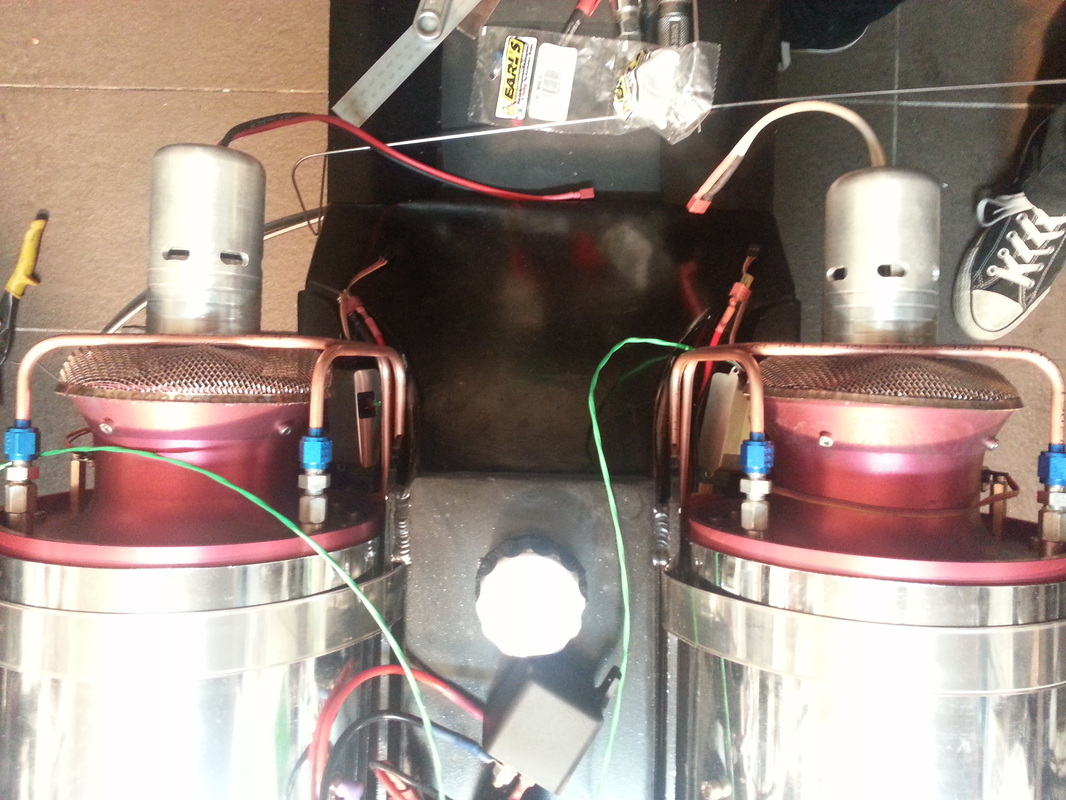
we first connected the afterburner pumps and afterburners up. we thought it would be a little more problematic than it was. but it worked out great. 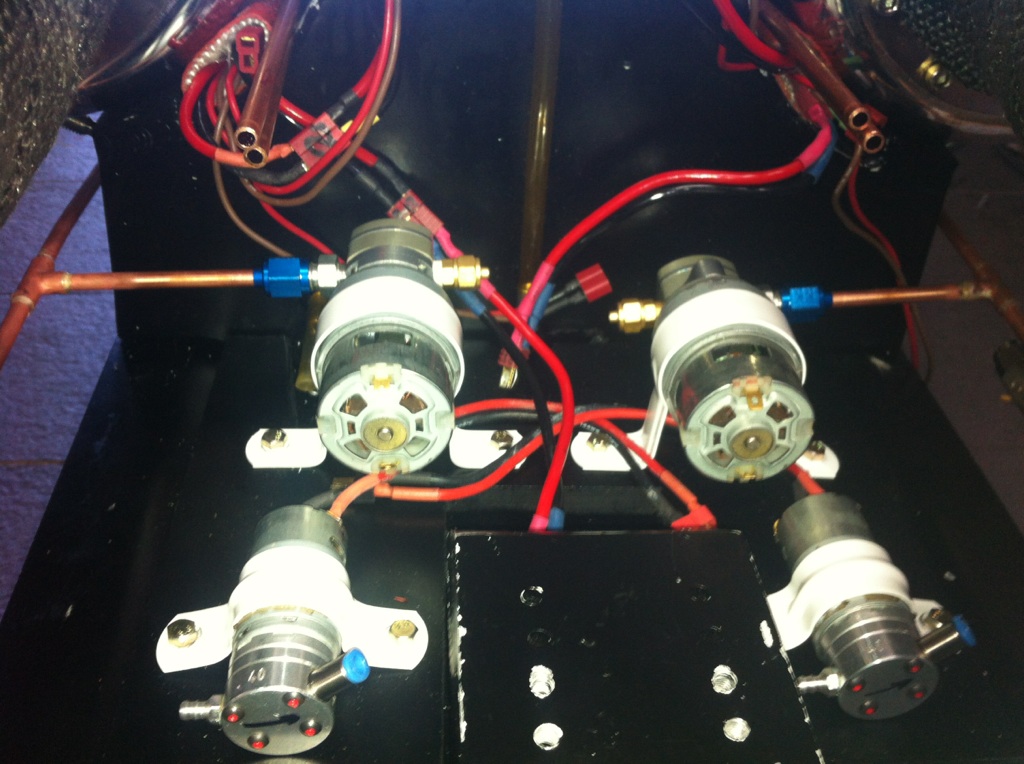
here you can see the afterburner pumps and afterburners fully connected. we now only have to run power to them and we have HUGE flames. 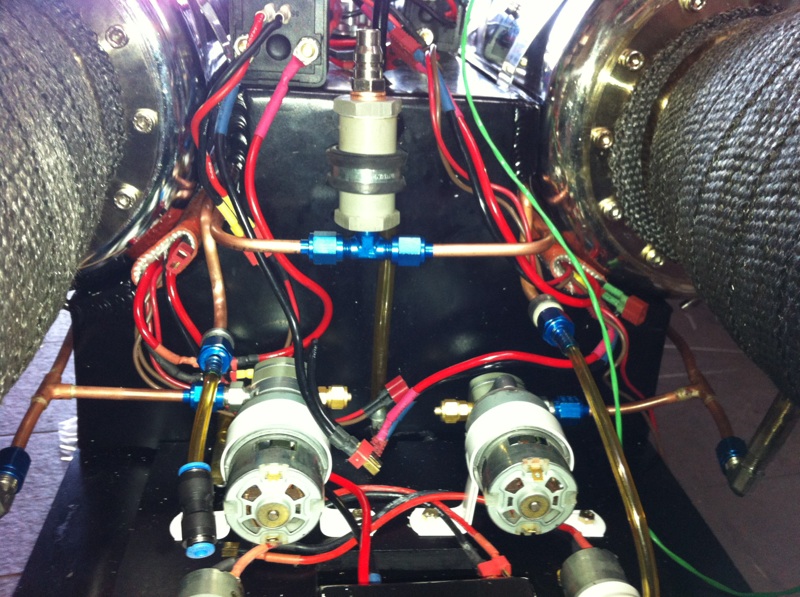
Above you can see very thing is now connected about 80% of the wiring will be gone as we have worked out a new way to run all systems on one battery. this will save weight and space, as well as making things much neater. that silver/grey tube cylinder in the middle sticking up is a one way valve for the dual gas lines for when i start the jets. i now simply attach a hose and release it once the turbines have gone through the preheat stage of start-up. it works amazingly. As a special treat take a ride along with Dave and i as he fires up his Jet car at a recent event. he was a little reluctant to be on camera at first. i apologize in advance for the skinny view. this was before i realised i had to turn the camera sideways.
WOW! it has been slow going of late. but i am still managing to get a lot done behind the scenes. basically, what i am doing, now that we all know that things are functioning how they should, it is time to find a more permanent place for the parts. All the fuel pumps are being relocate to the lowest part of the board. this will help with weight balance and safety. lowing the pumps lowers the boards centre of gravity. with the pumps and fuel in the lines your looking at about an extra 2kg so this is rather dramatic if you start to raise it above the center of mass. Now, with moving the pumps i am needing to find a new place for the electronics. so i have needed to make a new housing. then i will need to rewire some things to neaten everything up and not have excessive amounts of wire laying around. now one thing i have been looking at lately is new battery technology i want to minimise the batteries i need on board and also lower the weight. i have my eye on a couple and will be pursuing this in the near future. But first thing first and i will be putting in a heap of new fuel lines in the form of nice copper tubing. these will be the permanent fuel lines for the engines and the afterburners. so yes! you will be seeing flames really soon. so make sure you stock up on marshmallows. Below you will see how i laid out the pumps to get an idea of how they will fit. 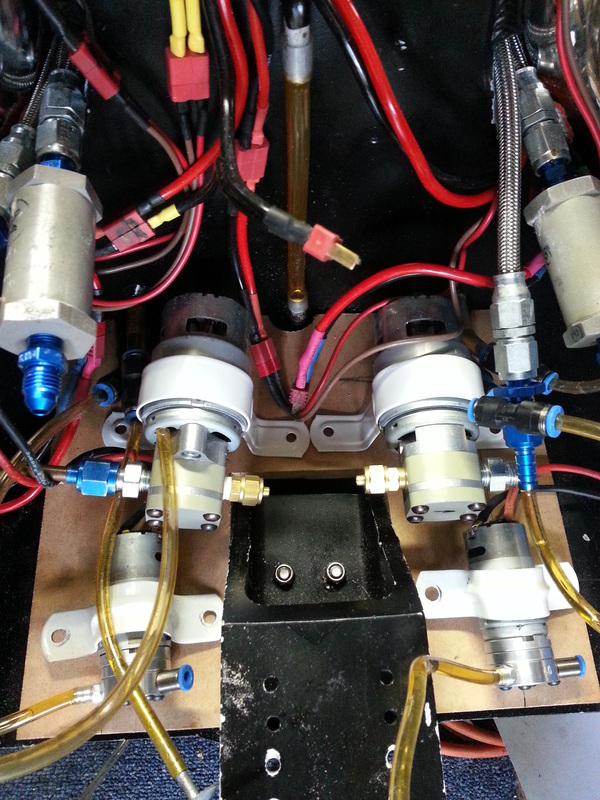 Below you can see that i now have the pumps mounted in their permanent places. the next thing is to build a cover to separate fuel and electronics. i will be running all copper lines to the pumps. the large pumps are for the afterburners and the small ones run the engines. i am still yet to work out where to run the gas lines. 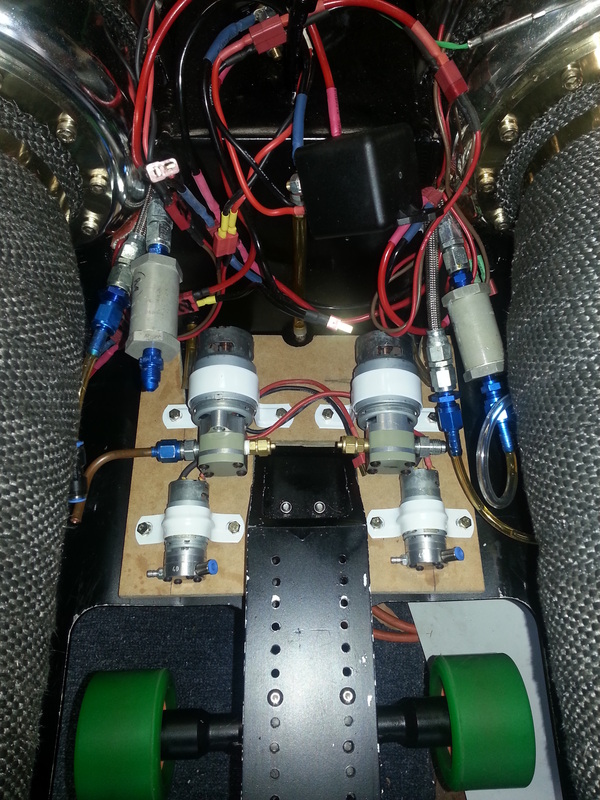 below you can see the finished and mounted fuel pumps. big ones for the afterburners and small ones for the engines. next is to plumb them up. 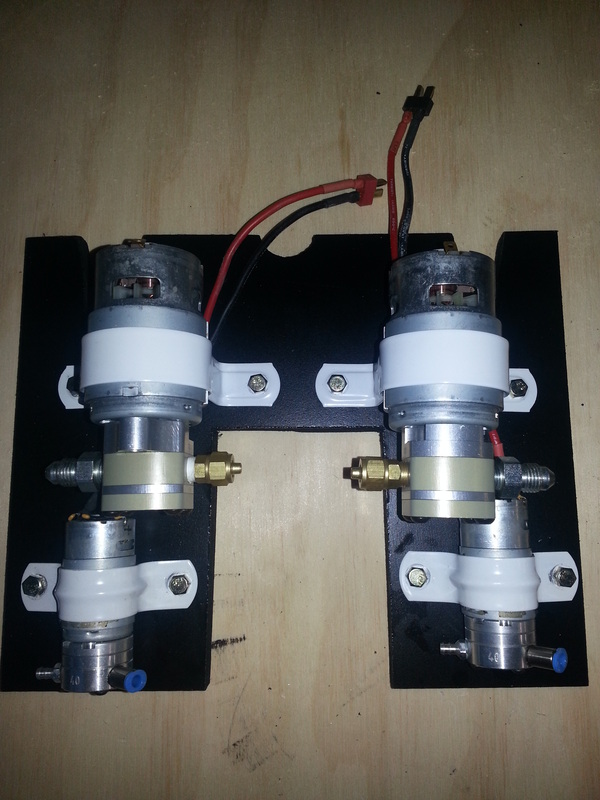 Below you can see the temporary box made to separate electronics from fuel. again this is only to give me something to work from while i build something more permanent this will also give me time to work out what i want to do with the MASS of batteries i have and the abundance of wires they create. i am seeking one battery to rule them all. so if you know any battery guys looking to get a new battery out there let me know haha. 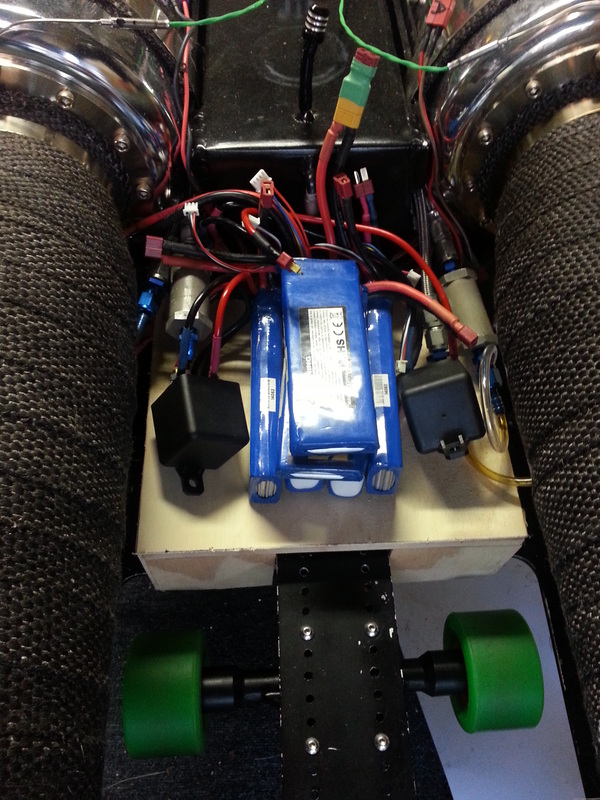 |

Partners:


Supporters:
Archives
August 2016
Categories
All
|


 RSS Feed
www.jetluge.com.au / CONTACT |
© Copyright JetLuge.com.au 2020-2027. All rights reserved.
|